การจัดเรียงโพรงและพื้นผิวการแยกส่วนของแม่พิมพ์
การจัดเรียงโพรงและพื้นผิวการแยกส่วนของแม่พิมพ์
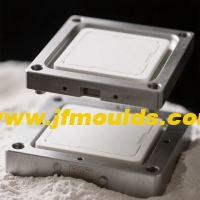
ชิ้นส่วนขึ้นรูปหมายถึงชิ้นส่วนแม่พิมพ์ที่มีส่วนร่วมโดยตรงในการก่อตัวของช่องว่างของโพรง เช่น แม่พิมพ์ส่งคืน (โพรง) การเจาะ (แกนกลาง) ชิ้นส่วน การดึงแกนด้านข้าง ฯลฯ เมื่อออกแบบชิ้นส่วนที่ขึ้นรูป ควรคำนึงถึงอัตราการหดตัวของแม่พิมพ์ของพลาสติก ความชันในการรื้อถอน และความสามารถในการแปรรูปสำหรับการผลิตและการบำรุงรักษา
โดยทั่วไปการออกแบบชิ้นส่วนที่ขึ้นรูปแล้วสามารถดำเนินการได้ในขั้นตอนต่อไปนี้
1) กำหนดจำนวนโพรงแม่พิมพ์
② กำหนดตำแหน่งของช่อง
3 กำหนดเส้นแยกของชิ้นส่วนพลาสติกและพื้นผิวแยกของแม่พิมพ์
④ เมื่อต้องการดึงแกนด้านข้าง ให้ออกแบบกลไกการดึงแกนด้านข้าง
⑤ กำหนดขนาดการขึ้นรูปของช่องแกนกลางและมุมร่าง
⑥ กำหนดวิธีการรวมและการตรึงของชิ้นส่วนที่ขึ้นรูป
ผู้ผลิตแม่พิมพ์อุจจาระในประเทศจีน (jfmoulds.com)
กำหนดจำนวนฟันผุ
หากมีการกำหนดเครื่องฉีดพลาสติกที่ตรงกับแม่พิมพ์ไว้ล่วงหน้า จำนวนฟันผุสามารถกำหนดได้สองวิธีดังต่อไปนี้
(1) ตามปริมาณการฉีดที่กำหนดของเครื่องฉีดที่ใช้
(น้ำหนักรวมของชิ้นส่วนพลาสติกในแต่ละช่อง + คอนกรีตในระบบ gating) 80% ของปริมาตรการฉีดที่กำหนดของเครื่องฉีด
(2) ตามแรงจับยึดที่กำหนดของเครื่องฉีด
สมมติว่าผลรวมของพื้นที่ฉายภาพของแต่ละช่องและรันเนอร์บนพื้นผิวการแยกส่วนคือส่วน S (มม. ²) แรงจับยึดที่กำหนดของเครื่องฉีดคือส่วน F และความดันเฉลี่ยของการหลอมพลาสติกบนคาวิตี้เป็นประเภท จากนั้น
S ครัวเรือนประเภท F ล็อค x 80%
หนึ่ง: การจัดตำแหน่งช่อง
หลักการจัดอันดับ
หลักการของช่องทางการไหลที่สั้นที่สุด: ลดวัสดุที่แข็งตัวในระบบประตู และประหยัดต้นทุนการผลิตเหล็กและแม่พิมพ์
2 หลักความสมดุลของอุณหภูมิ: ตรวจสอบให้แน่ใจว่าอุณหภูมิในทุกส่วนของช่องแม่พิมพ์มีค่าใกล้เคียงกันโดยประมาณ เพื่อรับประกันว่าอัตราการหดตัวของชิ้นส่วนพลาสติกในแต่ละช่องจะเท่ากัน
3 หลักความสมดุลของแรงดัน: ตรวจสอบให้แน่ใจว่าแรงดึงผลลัพธ์ที่แม่พิมพ์รับระหว่างการฉีดนั้นอยู่ใกล้กับศูนย์กลางของแม่พิมพ์และเป็นเส้นตรงกับแรงจับยึดของเครื่องฉีดขึ้นรูป
④ หลักการสมดุลการป้อน: สำหรับแม่พิมพ์ที่มีหลายช่องในแม่พิมพ์เดียว ควรป้อนชิ้นส่วนพลาสติกเดียวกันจากตำแหน่งเดียวกันเพื่อให้แน่ใจว่าชิ้นส่วนพลาสติกสามารถใช้แทนกันได้ ขนาดและความยาวของรางเลื่อนและประตูควรปรับให้เข้ากับขนาดของชิ้นส่วนพลาสติก และจำเป็นต้องตรวจสอบให้แน่ใจว่าช่องทั้งหมดถูกป้อนและบรรจุพร้อมกันให้มากที่สุด
ข้อควรระวังในการจัดเรียงแม่พิมพ์ที่มีหลายช่องในแม่พิมพ์เดียว
ควรวางชิ้นส่วนพลาสติกที่มีขนาดใหญ่กว่าหรือซับซ้อนกว่าไว้ใกล้กับรางหลัก ซึ่งก็คือ ปลอกประตู อย่างไรก็ตาม ไม่ควรจัดช่องภายในเส้นผ่านศูนย์กลาง 30 มม. รอบๆ ปลอกเกตให้มากที่สุดเท่าที่จะเป็นไปได้ หรือความหนาของเหล็กจากโพรงถึงปลอกเกตควรมีอย่างน้อย 8 มม.
สำหรับแม่พิมพ์ที่มีหลายช่องในแม่พิมพ์เดียว ความหนาของเหล็ก A ระหว่างแต่ละช่องและความหนาของเหล็ก B จากช่องจนถึงขอบของเม็ดมีดด้านในของแม่พิมพ์สามารถเลือกได้ตามความลึกของช่อง ยิ่งโพรงลึกเท่าไร เหล็กก็ควรมีความหนามากขึ้นเท่านั้น
Special circumstances include:
When a concealed gate is used, there should be sufficient space for the concealed gate and the position for arranging the push rods
b. When the plastic part is large in size and the cavity is deep (60mm)
c. The size of the plastic part is relatively large, and the inner model core is inlaid through. At this point, the insert forms a frame structure 1 with poor rigidity. The steel thickness should be increased to enhance rigidity.
When cooling water needs to be passed between the cavities, the distance between the cavities should be larger to ensure that the steel thickness between the cavities and the cooling water channels is no less than twice the diameter of the water channels.
Sure enough, when the mold needs to be core-pulled from the side, the sequence should give priority to core-pulling from the left and right sides, and try to avoid core-pulling up and down.

Two: Parting surface
The main contents of parting surface design
The main contents of parting surface design are as follows.
① Position of the parting surface: Which part is formed by the moving mold and which part is formed by the fixed mold.
② Shape of the parting surface: Is it a plane, an inclined surface, a stepped surface or an arc surface
③ Positioning of the parting surface: How to ensure the positional accuracy of the core and cavity, and ultimately guarantee the dimensional accuracy of the plastic part
2. General principles for the design of parting surface positions
(1) The principle of aesthetic appearance
The selection of the parting surface should minimize its impact on the appearance of the plastic part. Especially for plastic parts with clear requirements for appearance, more attention should be paid to the influence of the parting surface on the appearance
(2) The principle of convenient processing
The selection of the parting surface should make the mold structure simple and easy to process, especially for the processing of the core and cavity.
(3) The principle of easy molding
The selection of the parting surface should be conducive to the pouring of the melt, the venting of the cavity and the design of the cooling system. Usually, when designing the parting surface, designers often encounter problems where there are more than two demolding directions on the plastic part.
For the shorter stroke demolding direction, the slider is used for lateral core-pulling. However, when the lateral core-pulling mechanism closes the mold, the clamping force it can provide is relatively small. If the projected area of the plastic part in this direction is large, problems will occur. For molds with inserts, the simplicity and convenience of insert installation should also be taken into consideration.
(4) Smooth demolding principle
The selection of the parting surface is conducive to the demolding of the plastic part, ensuring that the plastic part remains on the side with the ejection mechanism during mold opening (sometimes it is.
(Moving mold, sometimes fixed mold.)

Three: Shape design of the parting surface
The shape of the parting surface is best when it is a plane perpendicular to the mold opening direction, followed by inclined surfaces, then smooth arcs, stepped surfaces, etc. The parting surface shall not have sharp corners or edges. Sharp corners and edges will make processing more difficult and also affect the sealing material of the parting surface and the service life of the mold.
(1) Step parting surface
There are multiple options for the parting surface of this plastic part, and the final choice often depends on the customer's requirements.
(2) Inclined parting surface
The inclined parting surface should be equipped with a stop mouth positioning surface to counteract the horizontal component of the expansion force. The positioning surface is determined based on the actual situation and can be on either side. Both (a) and (b) are acceptable. The inclination Angle of the positioning surface. It is generally 10 "to 15". The greater the slope, the worse the positioning effect. The inclined parting surface should extend outward by 5 to 10mm according to the Angle of the parting surface to prevent the edge of the cavity from cracking and to avoid movement during the FIT mold.
(3) Curved surface parting surface
The design of the curved surface parting surface is roughly the same as that of the inclined surface parting surface. In the figure, A=5 to 10mm, and the inclination Angle ea is generally 10 to 15°
(4) The parting surface that is rubbed through or bumped through on the side
If the threading as shown in Figure 4-5(b) is adopted, the formed plastic part has no wire clamping, as shown in Figure 4-5(d), but the plastic part is prone to flash, and the flash is balanced with the side hole, reducing the size of the hole. When rubbing through, it is best to have a slope of 3 or more on the side. If the piercing method is adopted, the plastic part can see the wire clamping, but it is not easy to have flash. Even if there is flash and it is perpendicular to the hole, it does not affect the size of the hole. a is taken as 6°-10°. If c is chosen, it can be suggested that the customer make a slope of 3° to 5° on each side of the bump hole, so that there will be no wire clamping.
(5) The parting surface of the inclined square hole
The inclined square hole should be given priority for penetration. The condition for penetration is that if a<1° in the figure, the lateral core-pulling a 3° should be given priority.
(6) There is a raised parting surface on the side
There is a raised structure on the side. The parting surface should be prioritized for lifting, but this will cause wire clamping. Moreover, since the draft angles of the moving and fixed molds are exactly opposite, the wire clamping on both sides will have obvious lifting, affecting the appearance. If the customer cannot accept it, only lateral core-pulling can be adopted.
(7) Piercing and rubbing through on the parting surface
"Piercing through" refers to the contact surface of the moving and fixed mold forming parts being perpendicular to or roughly perpendicular to the mold opening direction; otherwise, it is called "rubbing through". When the contact surface is parallel to or approximately parallel to the mold opening direction, it is also called penetration. From the perspective of the convenience of mold manufacturing, the sealing surface on the parting surface should be pierced by impact as much as possible to avoid being rubbed through. Except for round holes which can be pierced by insertion, insertion is generally prohibited for non-round holes. When there are large through holes on the plastic part and the impact penetration surface on the mold is large, the middle of the impact penetration surface should be left empty to reduce the impact penetration area and facilitate the FIT mold.
สินค้า Mould_Taizhou jiefeng Mold Co.,Ltd. (jfmoulds.com)
Four: Positioning of the parting surface
The guide pins and guide sleeves of the moving and fixed molds are clearance fits. They mainly serve to guide. The positional accuracy of the formed parts must be guaranteed during the design of the parting surface. If the plastic part is complex and the parting surface is inclined or curved, the shape and size of the sealing surface, how to position it, and there must be a measurement reference when designing the parting surface must be taken into consideration.
Even for planar parting surfaces or stepped parting surfaces, in order to improve accuracy, conical surface positioning is sometimes designed on the parting surface.

ข้อมูลที่เกี่ยวข้อง

วิธีแก้ปัญหาการแตกง่ายที่ทางแยกของความแตกต่างของสีและการไหลของวัสดุของแม่พิมพ์
2025-09-05
วิธีแก้ปัญหาการแตกง่ายที่ทางแยกของแม่พิมพ์ปรากฏตัว ...
การออกแบบแม่พิมพ์พิเศษ
2025-07-24
การออกแบบแม่พิมพ์พิเศษ 1 แม่พิมพ์ซ้อนกันแม่พิมพ์ที่ซ้อนกันสร้างขึ้นพร้อมกันสร้างการฉีด ...

การรักษาพื้นผิวของแม่พิมพ์
2025-07-26
การรักษาพื้นผิวของแม่พิมพ์ 1 กระบวนการบำบัดพื้นผิวทั่วไปวัตถุประสงค์ o ...

กำหนดกระบวนทัศน์ใหม่สำหรับอุตสาหกรรมแม่พิมพ์ฉีดผ่านความก้าวหน้าทางเทคโนโลยีและการฟื้นฟูระบบนิเวศ
2025-07-04
กำหนดกระบวนทัศน์ใหม่สำหรับอุตสาหกรรมแม่พิมพ์ฉีดผ่านเทคโนโลยี Brea...
วิธีแก้ปัญหาเช่นความโปร่งใสที่ไม่ดีมิติที่ไม่เสถียรจุดจุดและเส้นสีดำในผลิตภัณฑ์แม่พิมพ์ฉีด
2025-07-31
วิธีแก้ปัญหาเช่นความโปร่งใสที่ไม่ดีมิติที่ไม่เสถียรจุดและ ...
รายการการประมวลผลพื้นฐานและข้อกำหนดสำหรับฐานแม่พิมพ์
2025-09-30
รายการการประมวลผลขั้นพื้นฐานและข้อกำหนดสำหรับฐานแม่พิมพ์ (1) แม่พิมพ์แก้ไขจานและ ...